
Header Installation
-
charlie brown
- Posts: 23
- Joined: Wed May 02, 2007 9:12 pm
- Location: Sydney, Australia
Additional tips for those installing the Goodwin headers into a right hand drive (RHD) NC.
I fitted the GWR headers at home last night. 3½ hours to remove and 1½ to refit, from start to drive away.
I followed Brian’s recommended method but found that the RHD cars have an additional problem with clearance to remove the old system from the car, namely the steering column.
I removed the battery and battery box to gain access to the connection between the steering column and rack. There are two bolts either side of the universal joint. Loosen the bolt on the column and remove the bolt connecting the rack and slide the universal joint up the spline to disconnect the column from the rack. It then swings out of the way.
With the battery box removed you can get easy access to the alternator bolts. I found that I needed to remove the belt (use Brian’s method to ease tension) and remove both the rear bottom bolt and the top front bolt and loosen the front bottom bolt. When the old header is out you should refit the alternator and tighten up the bolts as it’s easier to do with no headers in the way.
I also needed to remove the front bolt on the lower half of the cat heat shield off the old system as the thickness of the bolt head restricts removal as it hits the back of the alternator when lifting the old headers out.
Reinforcing one of Brian’s tips. Make sure that you have a socket set that can get to bolts at odd angles in tight places. Do a check on the rear bottom head bolt before starting the job. I needed to use an off set ring spanner as my ½” flexible drive was too large. The bottom centre head bolt can be accessed from the wheel well using a couple of socket extensions clipped together.
The AC line wasn’t a problem. It is very soft and easily pulled out of the way.
I got full exhaust installed few days ago.
The header part took the longest.
While header still in place the mechanic slowly but shurely removed its 2 piece shielding (exposing a catalitic converter).

After thet heater rubber hose was disconnected from metal hose - only few drops of coolant escaped.
This allowed lifting original header almost seamlesly.
It was hard to remove studs from the original header (those that you screw midpipe to).
What eventually we did is to fix the stud very very hard into a metalwork "on table clamp" (like in a picture) and turn the header.

Installation of a new header went pretty fuss free.
Hope this helps,
Gennady
The header part took the longest.
While header still in place the mechanic slowly but shurely removed its 2 piece shielding (exposing a catalitic converter).
After thet heater rubber hose was disconnected from metal hose - only few drops of coolant escaped.
This allowed lifting original header almost seamlesly.
It was hard to remove studs from the original header (those that you screw midpipe to).
What eventually we did is to fix the stud very very hard into a metalwork "on table clamp" (like in a picture) and turn the header.
Installation of a new header went pretty fuss free.
Hope this helps,
Gennady
another tip for those looking to save time and knuckles. I realized this would make header install much easier after installing the turbo:
instead of messing with the alternator or scratching the car while taking out the old header and putting in the new one, undo the passenger motor mount bolt from the bottom (17mm), use a jack to tilt the engine to the drivers side a few degrees. This not only gives you precious room to swap headers but also gives you easier access to the bolts! Just be sure not to tilt too much so that you do not pinch the lines behind the motor.
instead of messing with the alternator or scratching the car while taking out the old header and putting in the new one, undo the passenger motor mount bolt from the bottom (17mm), use a jack to tilt the engine to the drivers side a few degrees. This not only gives you precious room to swap headers but also gives you easier access to the bolts! Just be sure not to tilt too much so that you do not pinch the lines behind the motor.
06 turbo
Great tip Mike! I just wish someone had posted it earlier.mann wrote:another tip for those looking to save time and knuckles. I realized this would make header install much easier after installing the turbo:
instead of messing with the alternator or scratching the car while taking out the old header and putting in the new one, undo the passenger motor mount bolt from the bottom (17mm), use a jack to tilt the engine to the drivers side a few degrees. This not only gives you precious room to swap headers but also gives you easier access to the bolts! Just be sure not to tilt too much so that you do not pinch the lines behind the motor.
Actually, from my experience you don't have to worry about pinching lines. Just jack it up til you get resistance, once the motor mount has been loosened ofcource.
Re: NC Header Installation
For those of you having trouble with removing/replacing the reused heat shield, try this:
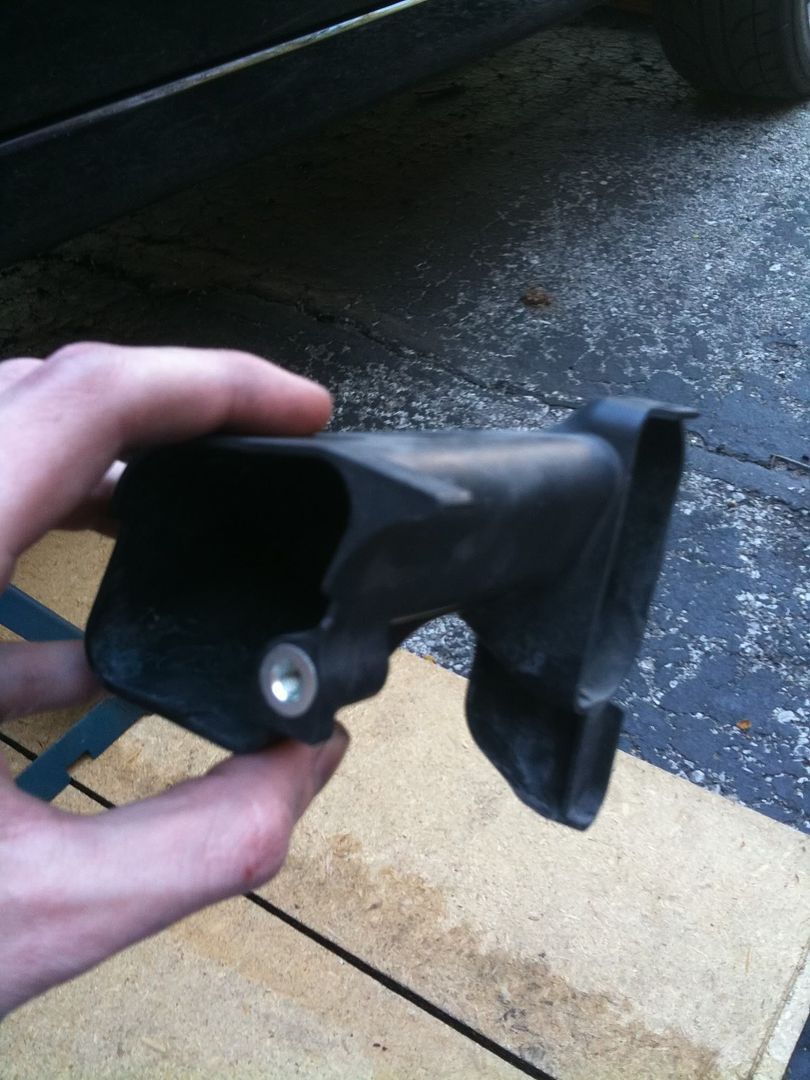
On the alternator, there is a plastic piece that looks like an air scoop. It's held in by one bolt and a clip.
Pic: http://i34.photobucket.com/albums/d134/ ... 9c36f2.jpg
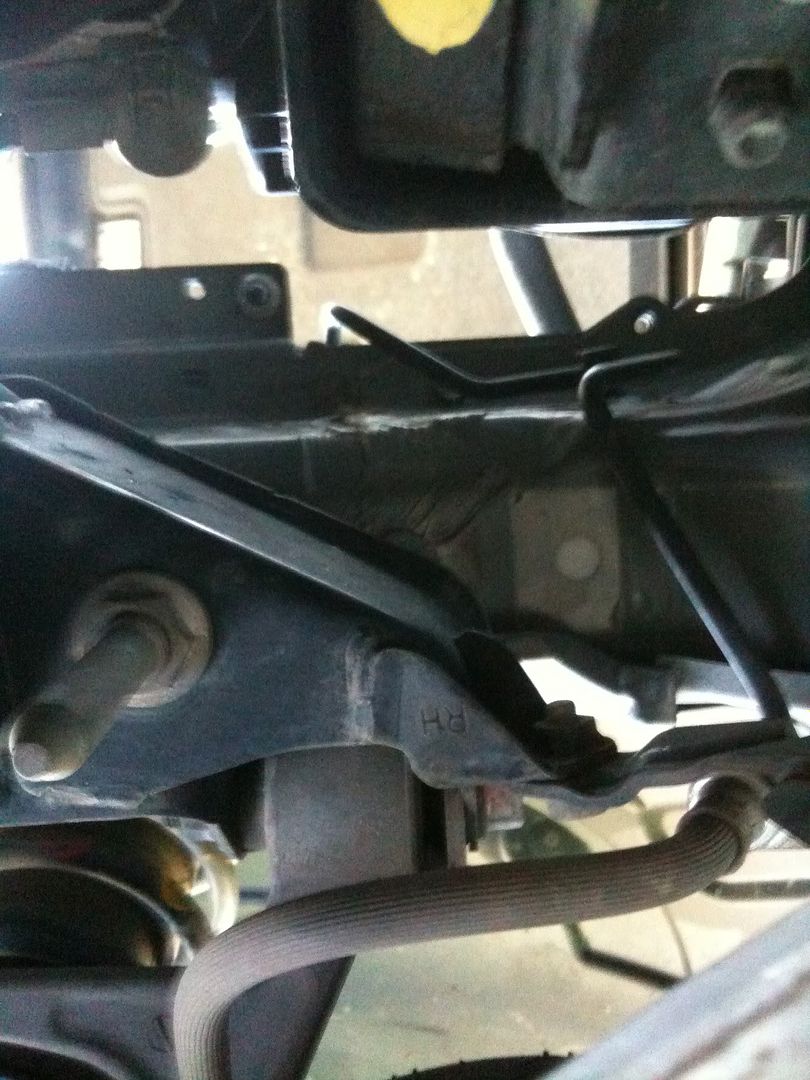
If you remove that piece, it opens up a nice, clean shot to the shield bolts from the bottom of the car. I took the pic after I removed it, so look for the two open holes.
Pic: http://i34.photobucket.com/albums/d134/ ... ea7bb3.jpg
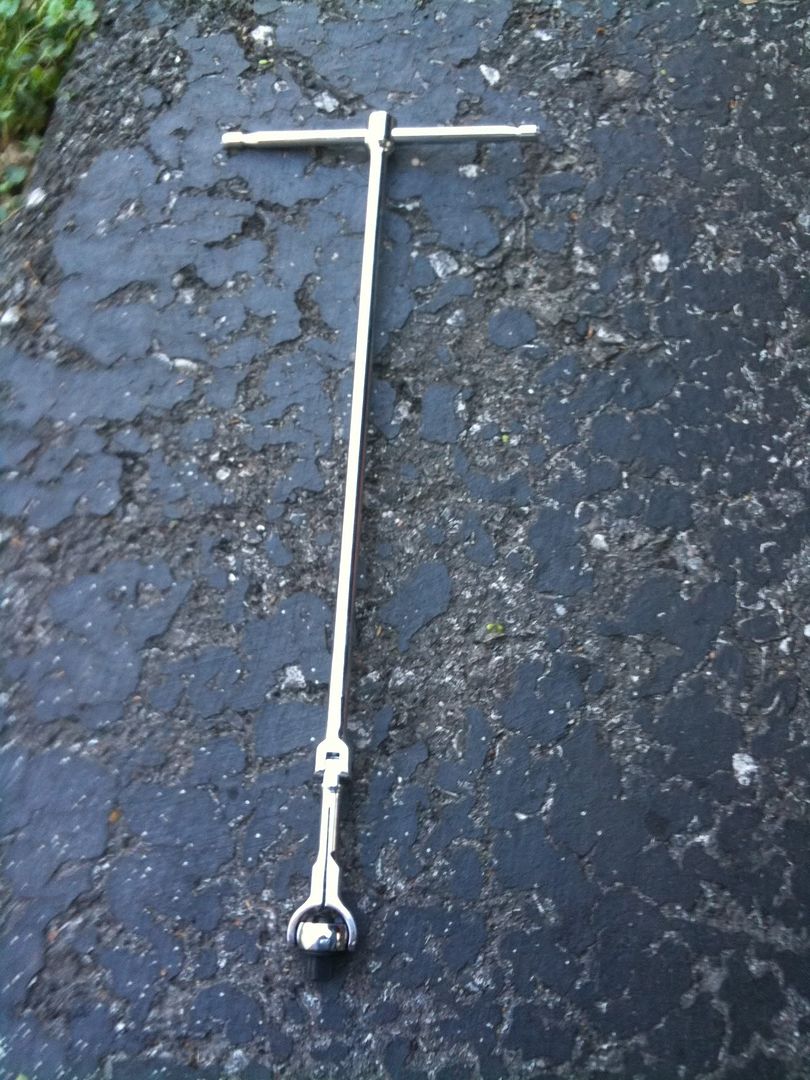
If you have a long, adjustable ratchet, these become much easier to remove. Pic below is what I used. I picked it up from Harbor Freight and it was probably the best $15 I spent on this project.
Pic: http://i34.photobucket.com/albums/d134/ ... 4f1387.jpg
On the alternator, there is a plastic piece that looks like an air scoop. It's held in by one bolt and a clip.
Pic: http://i34.photobucket.com/albums/d134/ ... 9c36f2.jpg
If you remove that piece, it opens up a nice, clean shot to the shield bolts from the bottom of the car. I took the pic after I removed it, so look for the two open holes.
Pic: http://i34.photobucket.com/albums/d134/ ... ea7bb3.jpg
If you have a long, adjustable ratchet, these become much easier to remove. Pic below is what I used. I picked it up from Harbor Freight and it was probably the best $15 I spent on this project.
Pic: http://i34.photobucket.com/albums/d134/ ... 4f1387.jpg
2007 MX-5 Sport PRHT, BB, 5mt
AEM CAI, RoadsterSport Head+Mid+Q, H&R coilovers, FM Sways, Cobalt FSTB
AEM CAI, RoadsterSport Head+Mid+Q, H&R coilovers, FM Sways, Cobalt FSTB
Re: NC Header Installation
One small tip...
I didn't want to waste time removing the heat shield in the future. Two of the bolts are quite easy to get to and fast to remove, but I found the bolt in the front (front of the car, nearest to the alternator) the most annoying. So I simply cut a groove in the heat shield in the bolt eye with some sheet metal cutters. Now I can just loosen the bolt, and slip out the shield. Good for quickly dressing up the engine bay to expose the beautiful header.
Mind the sharp edges (I rolled them over a tiny bit, but it's hard to see in the picture)
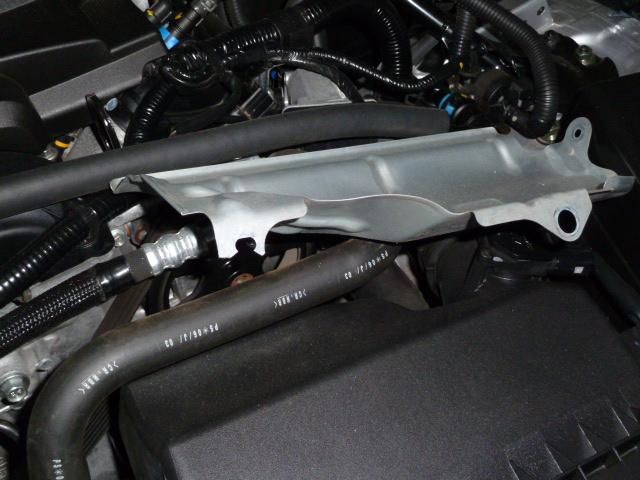
Time Estimate
Would any of you care to offer an estimate of how long it would take to do this header swap? Can a single shade-tree mechanic do it in one day?
Thanks.
Thanks.
2009, STR & DD. 1995, HPDE. 2004 MSM, sold. 2010 Mazda3, hers.
Re: NC Header Installation
Yes, you can do it in a day....I would say 4 to 8 hours.
Brian Goodwin
Good-Win Racing
www.good-win-racing.com
Good-Win Racing
www.good-win-racing.com
Re: NC Header Installation
Brian,
Great. Thanks for the info.
As you may have guessed, I'm trying to plan out my next mods. It's tough, since I only have short periods of time to work on the car, and it's my daily driver.
Thanks again.
Great. Thanks for the info.
As you may have guessed, I'm trying to plan out my next mods. It's tough, since I only have short periods of time to work on the car, and it's my daily driver.
Thanks again.
2009, STR & DD. 1995, HPDE. 2004 MSM, sold. 2010 Mazda3, hers.